Tools:
Dolphin Debug Mode
Dolphin Memory Engine (DME)
First, what you are going to want to do is start up the game you want to make this (This tutorial uses NTSC Wii Play v1.0) for and load Dolphin Memory Engine. When you load into it make sure you have these EXACT Settings.
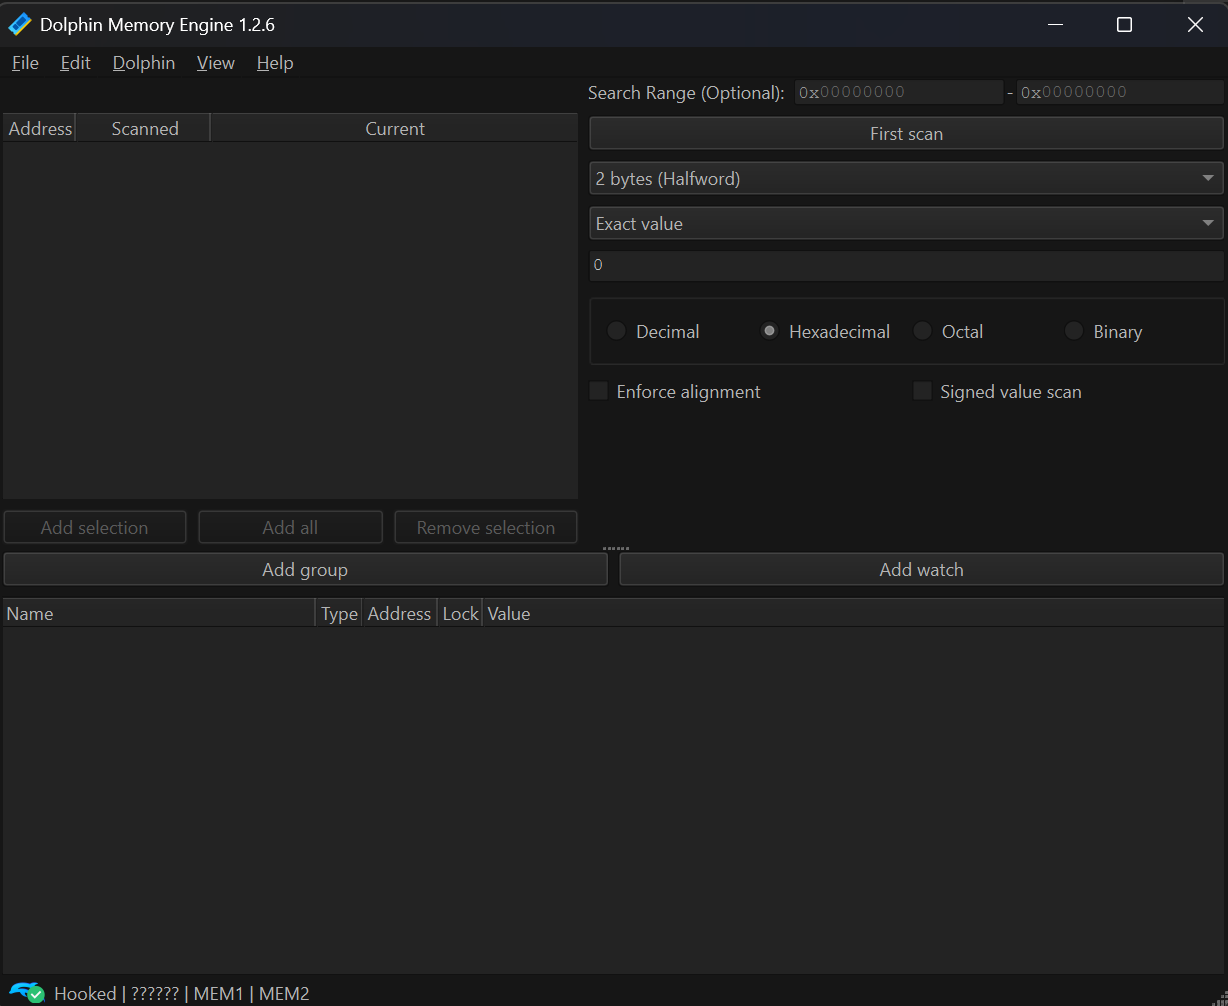
Now press any button on a Real Wii Remote (or a keyboard with hotkeys), and pause Dolphin. Now go into the text box in DME and type in what you see here (Hexadecimal)
Controls:
A: 800
B: 400
1: 200
2: 100
MINUS: 1000
PLUS: 10
UP: 8
DOWN: 4
LEFT: 1
RIGHT: 2
Z: 2000
C: 4000
Now you will see results, let go of the button and type 0, you should see about 20-30 results.
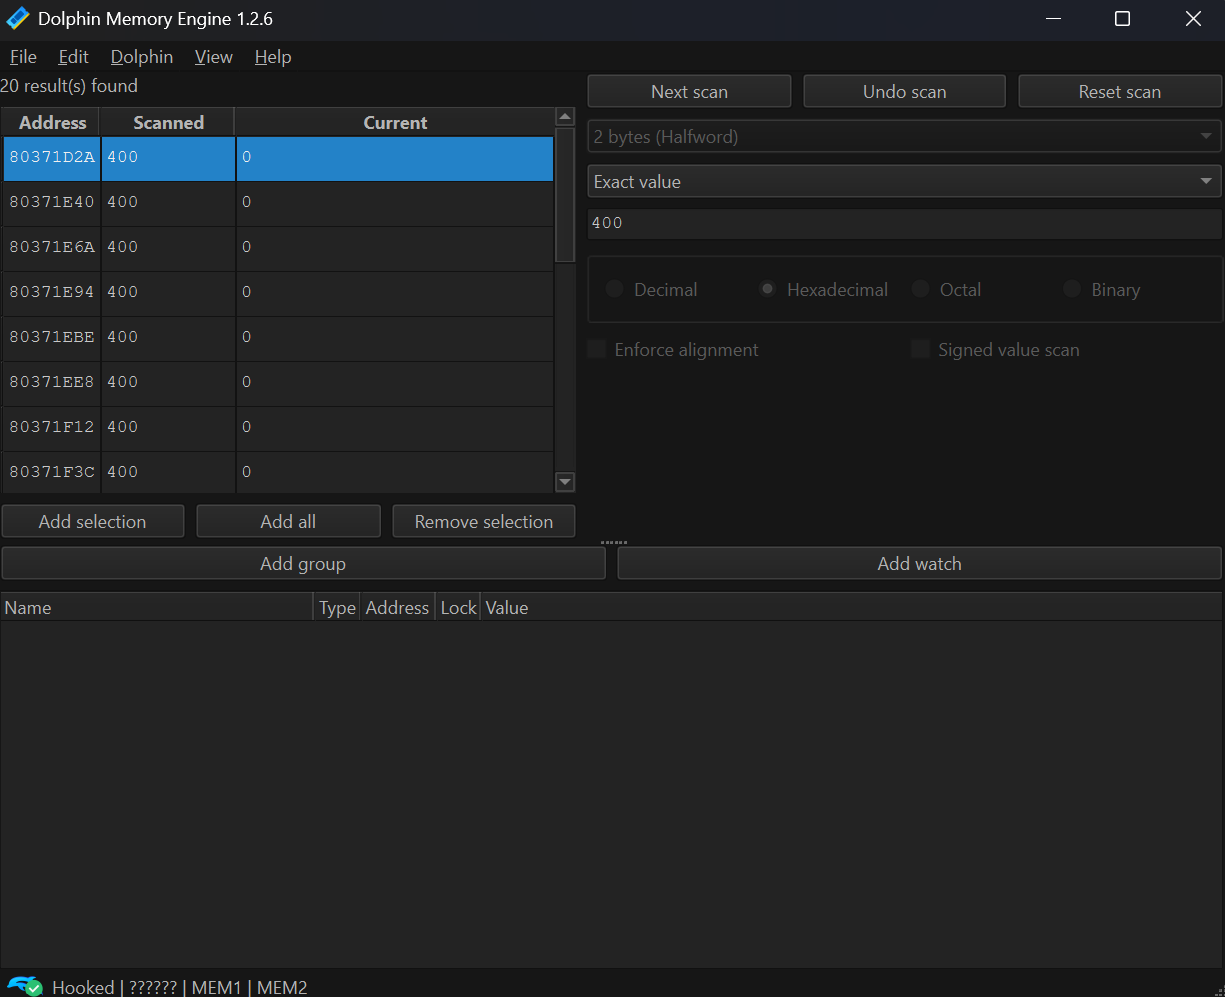
Usually for me, the first address that ends with "A" works. It might be different for you but pick the first with the "A" at the end. Now right-click on the address and copy it. Go back to Dolphin, right click on your game, select "Properties", and go to the Gecko Codes Tab
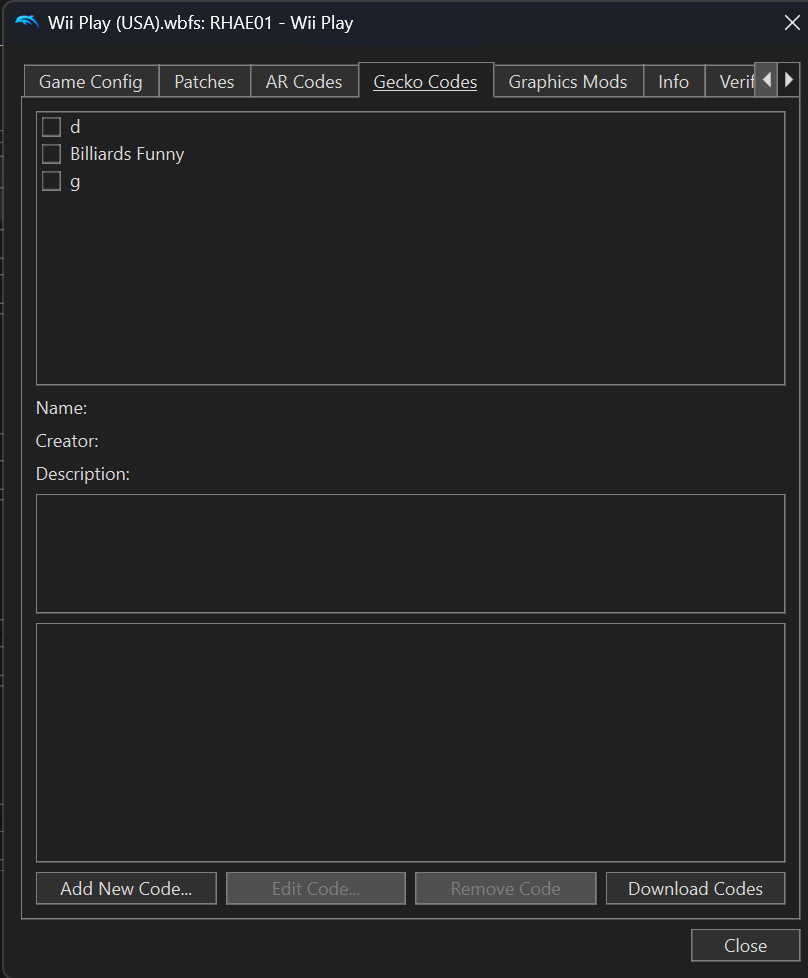
Click "Add New Code...", give it a name, and put the address in the Code Text Box. Replace the 80 with 20 to make it a If Equal code. Subtract 2 (in Hex) from the address (0xA - 0x2 = 0x8). Add 0000XXXX (Replace X's with the Button you want). Add the Code you want the button to trigger when pressed, and add "E0000000 80008000". (Optional: Add CC000000 00000000 to make it be like a On/Off Gecko Codes) It should look like this.
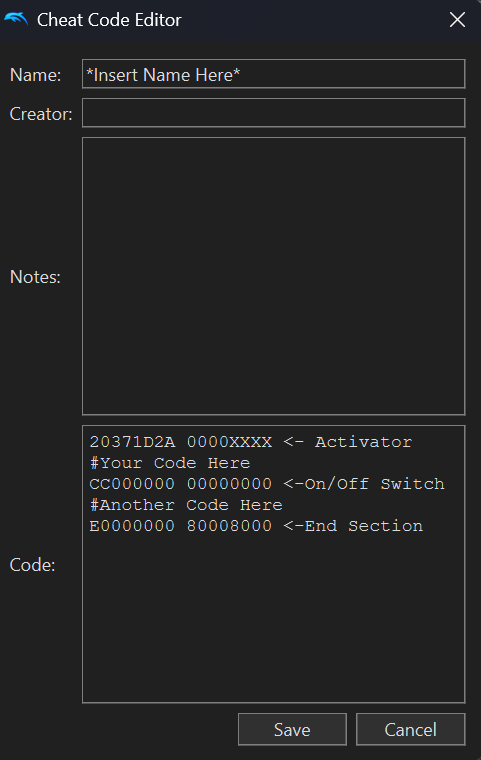
If you did it right, you just made your own button activator!
Tools:
VS Code (You can use the Web build of it)
Dolphin
Wii/Wii U Console
Disc of your game
PyiiASMH 3 (Dolphin Debug Mode works too)
This tutorial is just Riivolution XML I'll assume you already know how to add custom files and how to extract files from the disc.
First, I would recommend you downloading this template I made. In order to download it, right-click on it and click "Save link as"
Riivolution XML Template
It should look like this
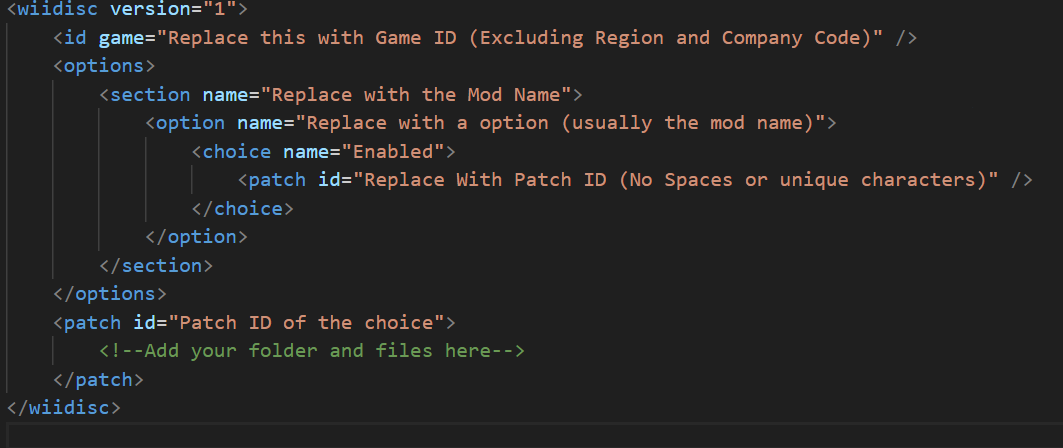
I'll put my own mod example for OGWS to show you. First I'll show you how to add more choices. There are 7 things that make up a riivoltion XML (only pointing the important ones)
WiiDisc: This allows riivoltion to determine what game the mod is for.
Options: If I had to give an accurate description, it would be to power everything else as without this the whole mod wouldn't work
Section: The Page (you can have multiple in one XML)
Option: Not the same as Options, this give what options you're mod will have
Choice: The choice for the option
Patch: This is what is responsible for loading the files, folders, cheats, and more
/: Yes I included this. This is this in front of all of the other options and it means that it is the end of that thing.
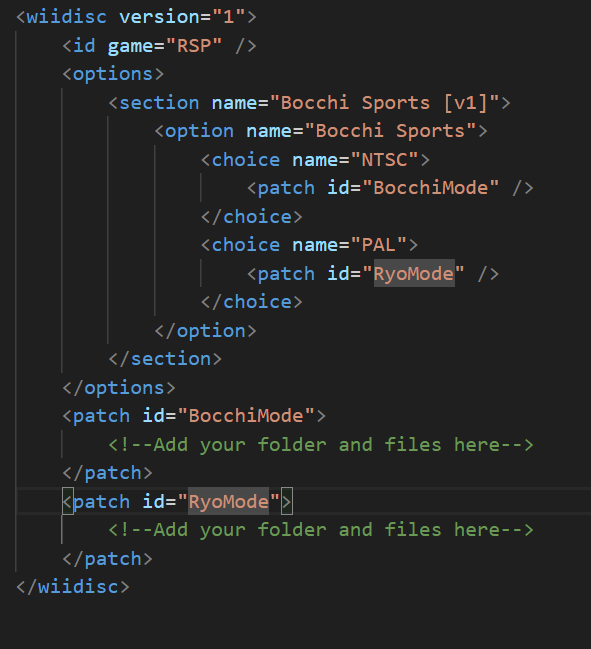
Enought about that, now I'll tell you how to to more choices. After you see the /Choice you will copy over the choice name and Rename it. You are also going to want to add the Patch ID and rename that too. After that add the /choice again, copy the patch id at the bottom (including /patch) and paste it under the first /patch, and it should look like this.
To add more options just do the same thing as choice, but with options (I don't know how to explain it). Make sure to add the choices and Patches of course.
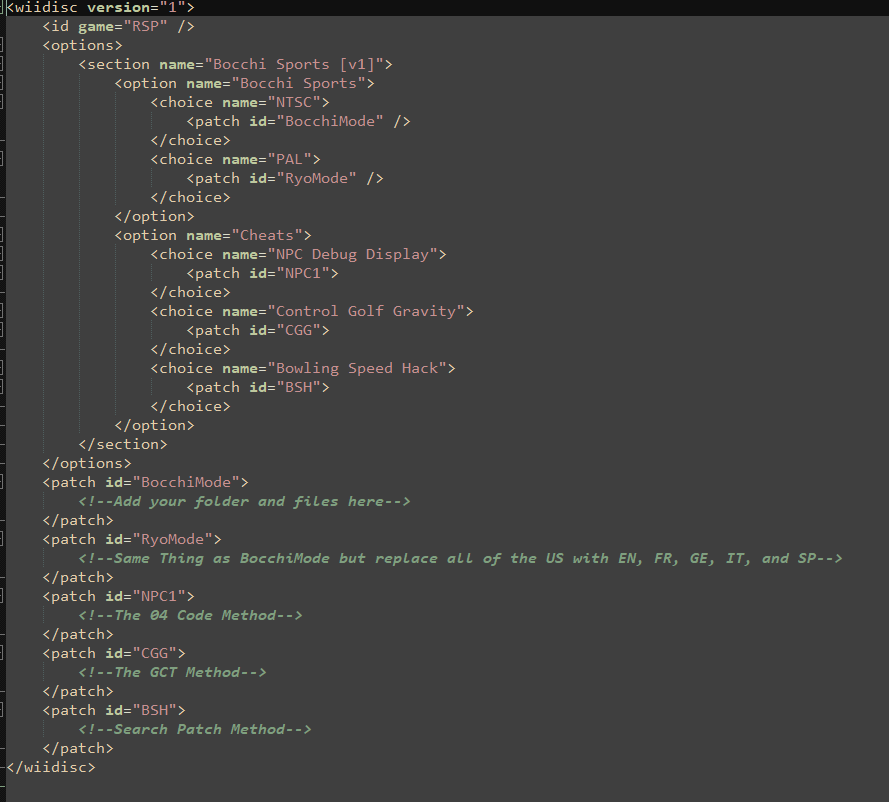
You can do the same thing for sections if you want multiple pages. Now onto the cheats, first the 04 method, this CAN work with C2 Codes if you know how to disassemble them and reassemble them as 04 Codes
Say we have this gecko code "04332814 2C000001", the address that is being used is "80332814", so we would do it like this.
Memory Patch (ignore the orginal part for now)
Replace the Memory Offset with your address and the value with your value, if you did it right it should look something like this.

The max you can do this at is 0x817FFFFF for some reason. Now the GCT method
This method isn't too good as the way GCTS work is that you can only have what you put in and nothing else or else only one will work, so only use this where you're using F6 Codes or Conditional Codes
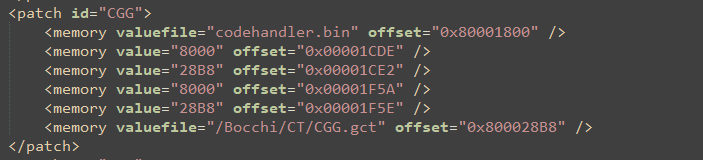
What you are going to want to do is copy this down (Replace the valuefile with your own .gct file).
GCT Method
Code Handler
It should look like this (use my GCT Creator to make the GCT)
Now the search patch method, this is the most useful if you know how to implement it right. The other two methods only work in it's region (unless if it's an F6 code), search patches can help get rid of needing multiple codes (sometimes it does fail tho). JimmyKazakhstan has a more detailed explaination on how they work as well as generators for Riivolution Patches.
Riivolution + PowerPC + Gecko Generators
I would recommend you to look at that as he goes more in depth on how this works. It should look like this

Hopefully this all made sense to you, I'm not really good with explaining things over text, so sorry if it looks like I skipped over some stuff, I just can't explain things the best without a video.
Tools:
ROM of Wii Play you have LEGALLY
Dolphin
Brawlcrate
3D Model Software (Blender for this)
KCL, PMP, and KMP Editors (Provided here)
Go to Dolphin and find your path with your ROMS, right click on the Wii Play one and click "Properties", go to "Filesystem", and right-click on the one that says "Disc" and click "Extract Entire Partition". Make a new folder and put it in There
Get any 3D Model you want, I'll be using SNES Mario Circuit 1 from Mario Kart DS, open it in your 3D Modeling software (Blender for me) and if it's one object, go to "Edit Mode" and click P to seperate by Materials. Go back into Object Mode and size it to your liking
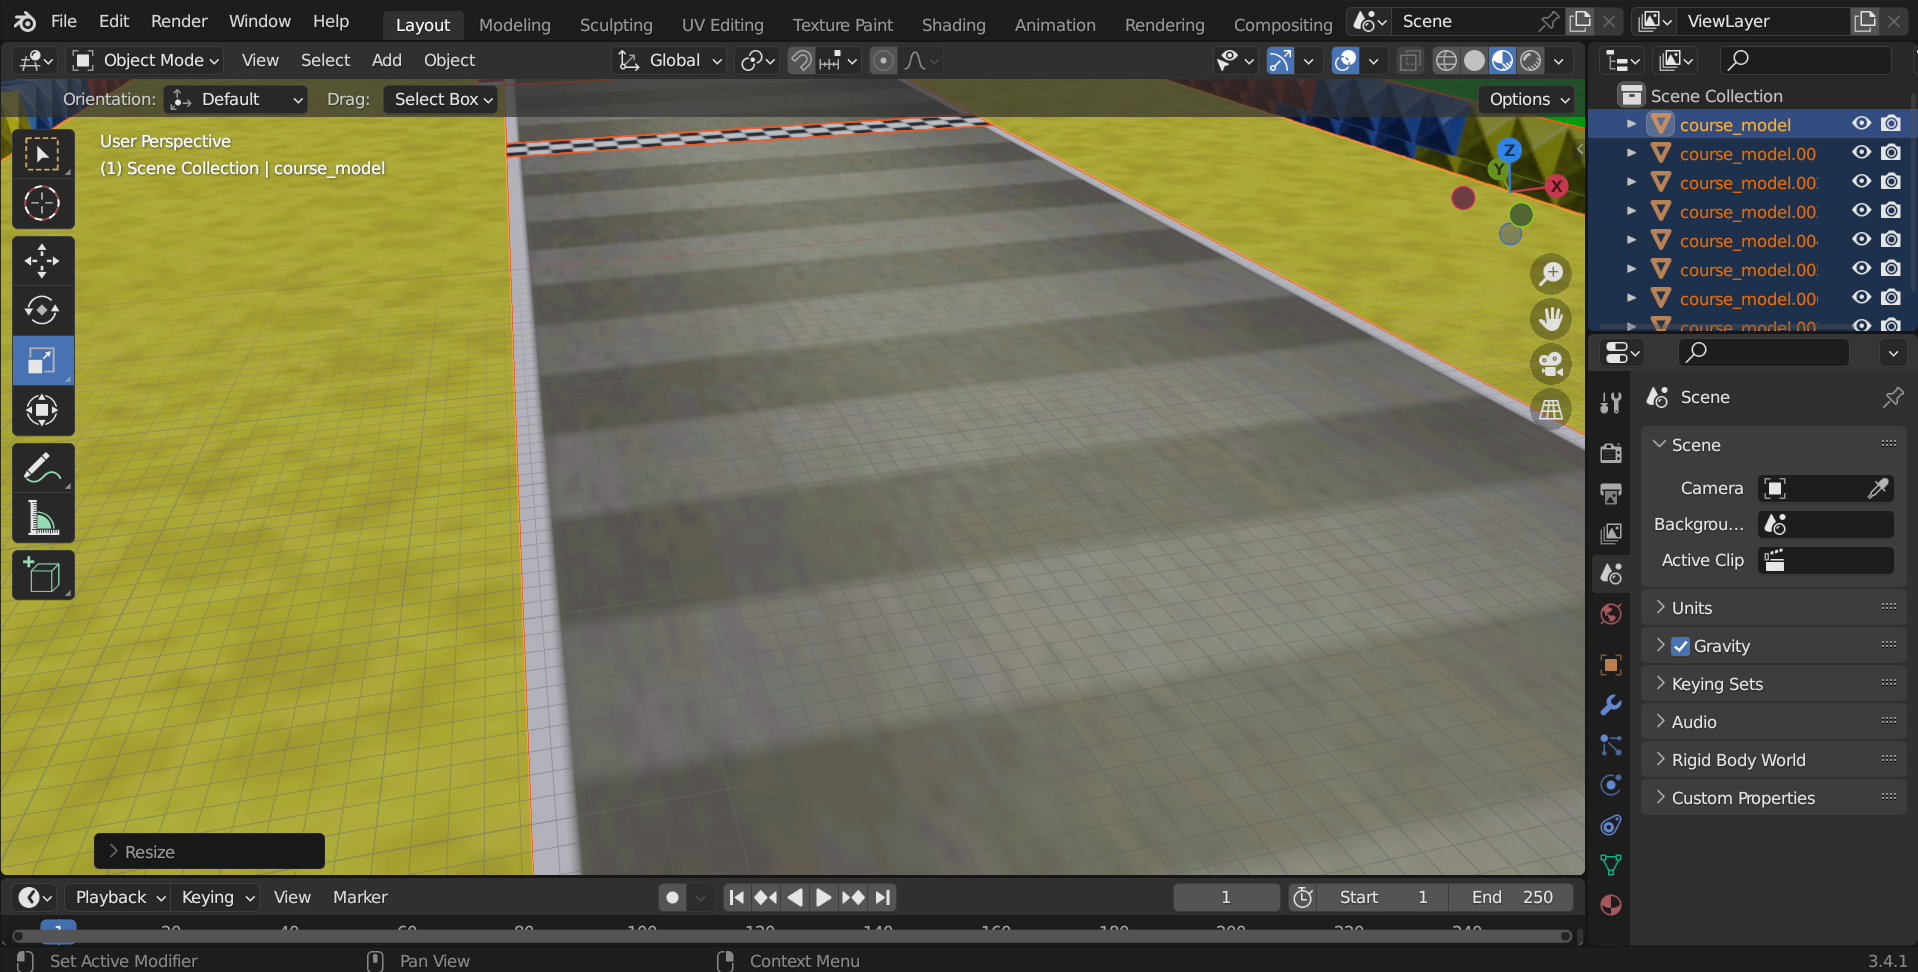
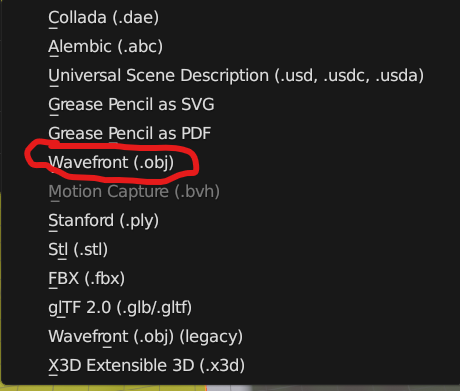
Once it's scaled to something big enough and you like, you can export the file as an .obj file into a new folder (DO NOT CLICK THE LEGACY ONE)
Next, we're going to work on the collision. Download the .zip file to get access to all the tools for this. You'll need ALL of them for later.
CustomWiiModelTools.zip
For now, open KCL Importer and Lorenzi's KMP Editor. On the KCL Importer, click "From Object" and select the .obj file you exported. Select Material by Meshes, Change the Game to Default and the Platform to Wii. Here are each collision type (THESE ARE JUST MY GUESSES):
0x1: Road
0x2: Grass
0x3: Fence(?)
If anyone wants to correct me on this, let me know. Set these collision values for each object (Remember which is which). The KCL will then export (unless there's too much polygons) and save it. Open Lorenzi's KMP Editor and click "Import Model". Select the .kcl file and click the objects tab. Click Alt+Left-Click and check the Y Axis (THIS IS VERY IMPORTANT)
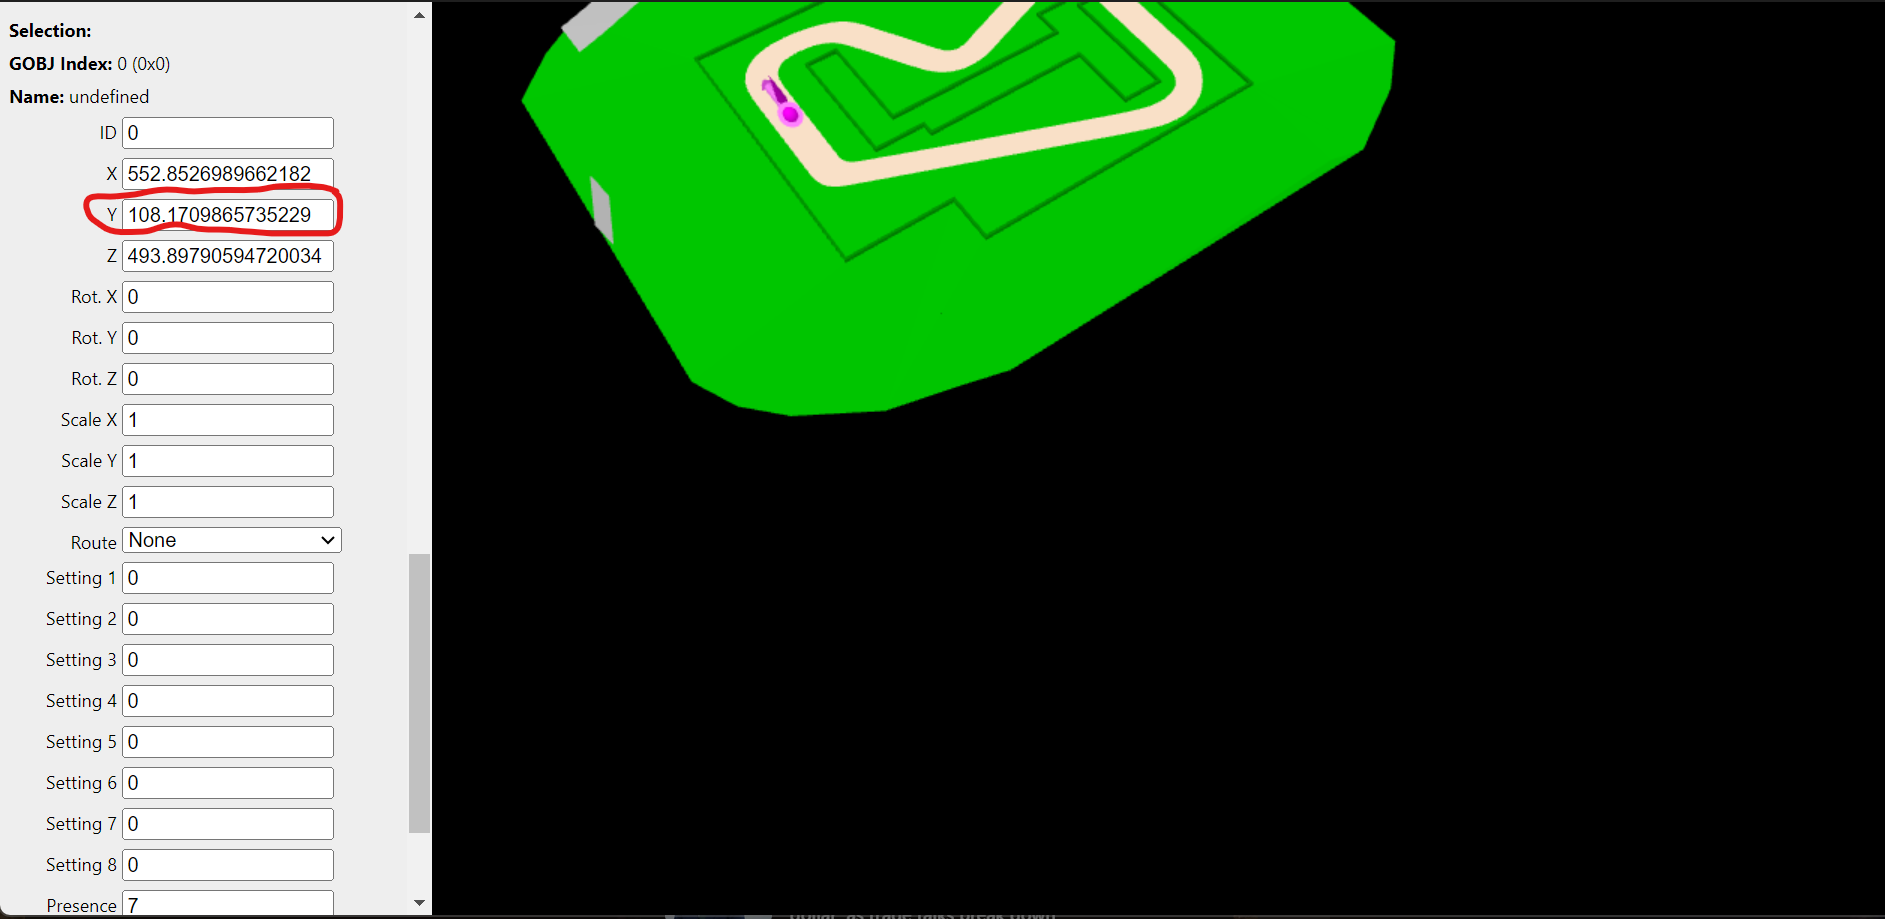
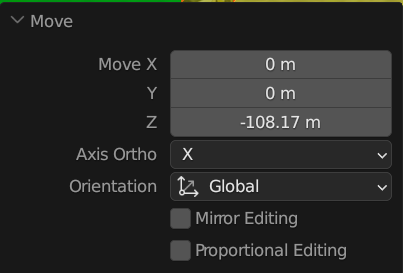
Go back into your 3D Modeling software and move to object down, if you're on Blender, a tab called "Move" will appear. Expand it and change the Z to -[Original Y Axis Value].
Export the .obj again and repeat the same steps from earlier. If you did it right, the Y axis should show 0 (with decimals).
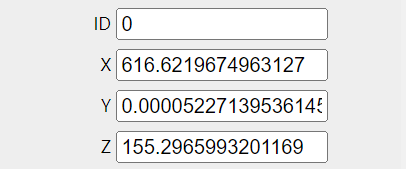
Why do this? In Charge, the cow can NOT go up at all, even with PMP editing and working collision. The only exception to this is the cow jumping
Exit the 3D Modeling Software and then open it again (Sounds very stupid but just wait). Import the .obj file and rotate it -90 by it's X Axis (for some reason, BrawlCrate just rotates it 90 degrees when importing). Export as .dae and open BrawlCrate.
Open "Common/RPCowScene/common.carc" from the folder with your Wii Play Data into Brawlcrate. You'll need to focus on 3 files for this
1. cow_field1P.kcl
2. cow_field1P.pmp
3. G3D/cow_field.bress/3DModels(N4WR)/cow_field1P.mdl0
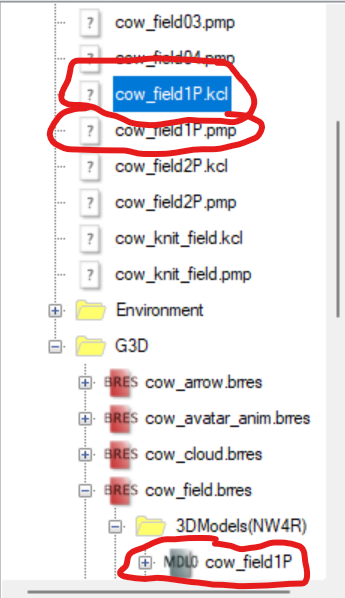
Replace the kcl with your modified one. Export the .pmp for later and right-click on the model and go to "Import Asset => Object" and import the .dae file. You'll get a confirmation screen, copy these settings and click okay.
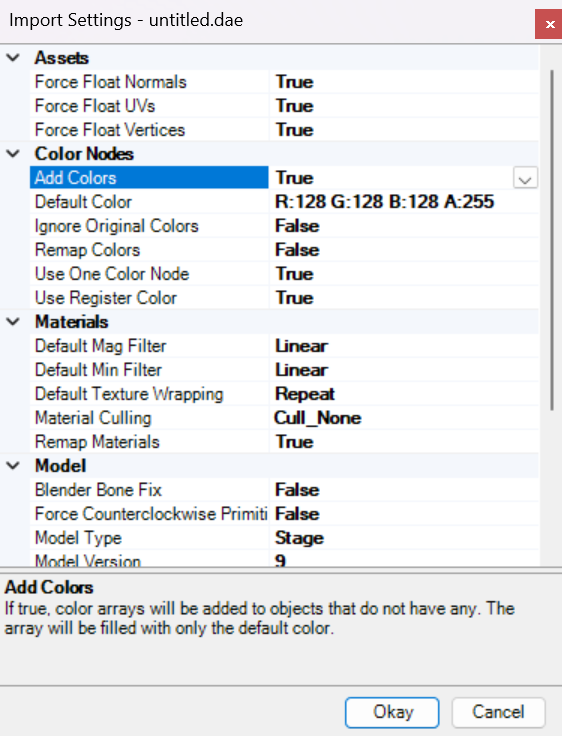
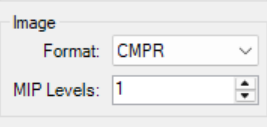
Make sure to click "Merge both models" and click okay. Import the textures by going to the .bress file and click "Import => Textures". Select ALL of your textures and make sure you set every photo's format to "CMPR" (it will look low quality but it's better than crashes)
Go to the plus sign on the model and click the Objects folder and click the delete button on the original objects (DON'T DELETE THEM USING CTRL+DEL)
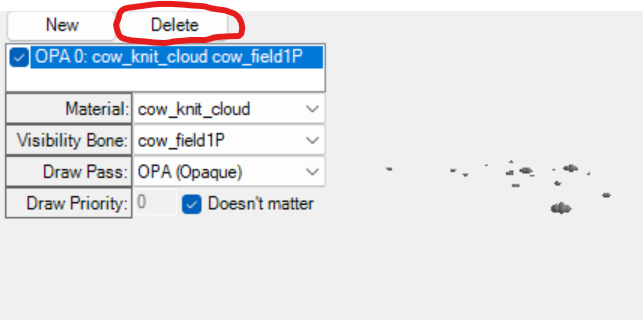
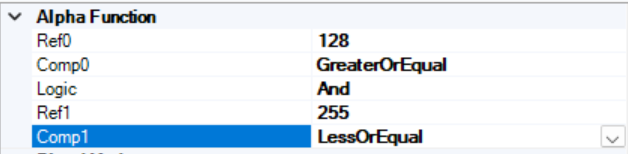
Go to the Shaders folder and go to the last shader. Expand it and click Stage0 and set the scale to "MultiplyBy2". If you have transparent texures, go to its material in the Materials Folder and set them to these EXACT settings.
Open the PMP Editor and open the pmp file in there. Open the Group 0x0007 and ignore all of the Objects EXCEPT "0x0001" and "0x0002". These are the start and goal. Open the kcl in the KMP Editor and add 2 objects. One is for the start and one is the Goal. Copy and paste the values from the KMP Editor into the PMP Editor and save in the PMP Editor (It will ask you to Save As, just rename it). Replace the original pmp file in BrawlCrate and then save the file.
In order to test it, go to Config in Dolphin, then Paths and add the folder with your Wii Play Stuff with the "sys" folder. Open it and if you did it right, it should work!
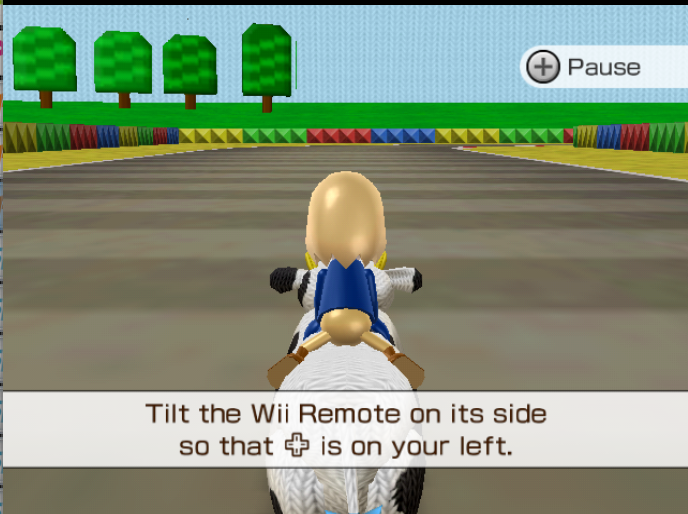
Hopefully this helps! I'll have better info in the future, but I wanted to share my knowledge to you.